
Whitening step by step
At a glance
- What this covers
- Six home-whitening steps, from brushing to cleaning the tray
- Before you decide
- Use a small amount of gel and follow the wearing time given by the clinic.
This is the sequence for home whitening. Please follow it in order.
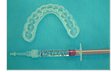
Brush your teeth
Brush your teeth.
Apply a small amount of gel
Spread a thin layer of gel in the tray. The gel can irritate the gums, so use a small amount rather than a generous one.
Wipe teeth and fit the tray
Wipe the outer surfaces of your teeth with tissue or gauze and fit the tray.
Follow the prescribed time
Wear it for the time the clinic has told you. Recommended wear time differs by product and concentration, so please do not extend it on your own.
Remove the tray and brush
When you want to stop, take the tray out and brush away any gel left on the teeth.
Clean the tray
Rinse the tray under running water to remove gel from the inside.